Hello, fellows tech-savvies! All right, so, you have finally decided to leap Valorant? That’s a cool choice! But before you start strategizing with your team, let me pop up with this all-important question: how much space is this tactical shooter game likely to occupy in your PC?
Knowing the Valorant size and system requirements of a game isn’t some minor detail; it’s more like a pass toward smooth gaming that’s uninterrupted. In this tutorial, we’ll break down what you need to know and give you several very helpful tips that will optimize your setup.
Downloading Valorant: Size & System Requirements
So, what is Valorant size? Keep in mind that the full installation of Valorant takes up 28.4 GB of space on your hard drive. Here’s a quick guide to help you get started:
- Visit the official Valorant website and download the installer executable. Since the initial download is only 66.1 MB, you won’t have to wait long.
- Once you have the .exe file, double-click to begin the installation. The client will notify you of the total game size as it downloads, so you’ll be aware of the 28.4 GB requirement in advance.
How to Free Up Space for Valorant?
Now that you know the Valorant size, i.e., 28.4 GB, you could be running a little short in terms of available storage. Well, don’t sweat! There are one or two practical solutions to free up space in your system without having to sacrifice anything critical in terms of performance.
In this in-depth tutorial, you will be guided through three of the best ways to do that: disk space analysis and deletion of unnecessary files, extending your C drive for placing the game, and migrating large-sized applications to another drive. Let me explain each one of these in detail, one by one.
Interesting Blog:- Vulkan Run Time Libraries: How to Know if it is Already Installed?
Method 1: Analyze Disk Space (Step-by-Step)
First, you should figure out what eats up all that priceless disk space on your computer. Large unused files, programs that have never been used and can be deleted without affecting your computer, applications—it takes only a few clicks to make it free for Valorant installation with the help of such tools as EaseUS Partition Master-Space Analyzer.
How-to Guide:
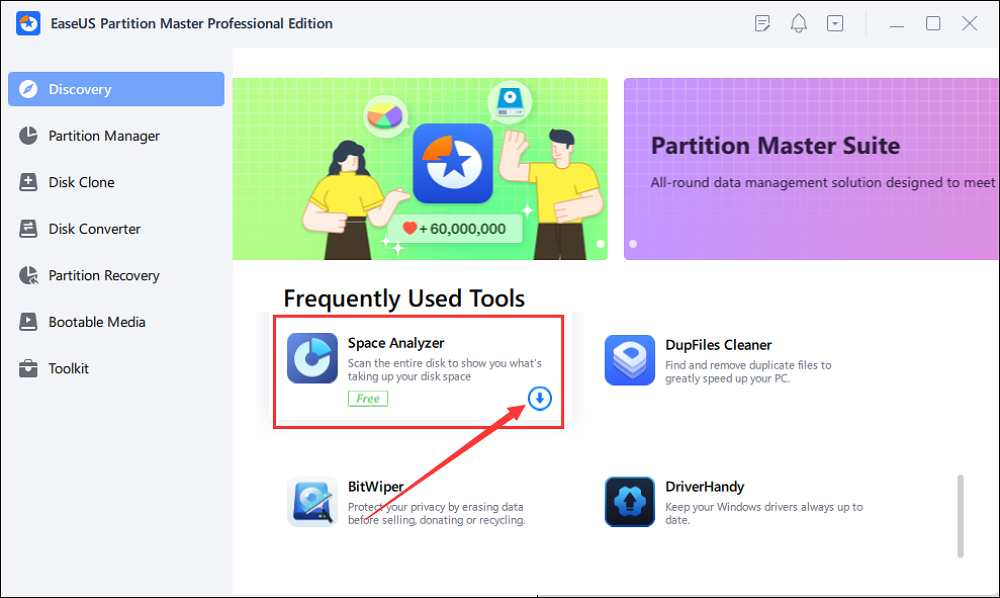
1. Launch EaseUS Partition Master: If it is not installed on your computer, download the EaseUS Partition Master. Once you have opened the application, click the Discovery tab located on the top bar.
2. Space Analyzer: Under the section commonly used utilities, find Space Analyzer. Click the icon to download this utility. The utility will install automatically; this may take some time.
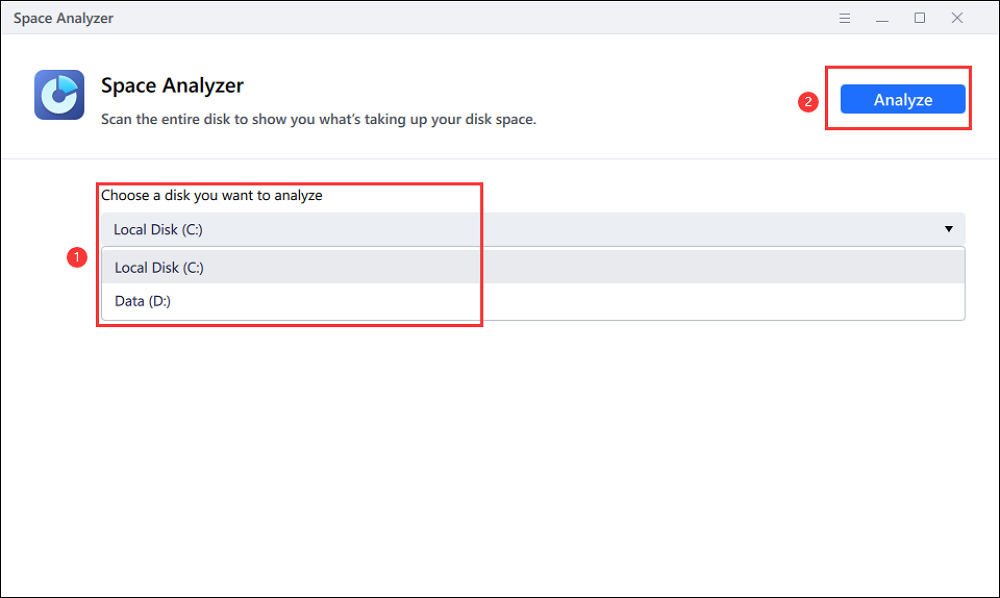
3. Select a disk to analyze: The moment the Space Analyzer window opens, it will ask you to select which disk you want it to analyze. Choose the drive that is running low in space, normally where your OS and programs are located. Click the Analyze button in the top right corner to scan.
4. View Results and Identify Unwanted Files: This, by default, visually shows you at the end what kind of files—for instance, huge video files, temporary files, or orphaned programs—are taking up what space. You click into small folders or file groupings for a further breakdown of what’s inside. Anything you find that you don’t need anymore, such as old downloads or apps you no longer use, you can opt to delete.
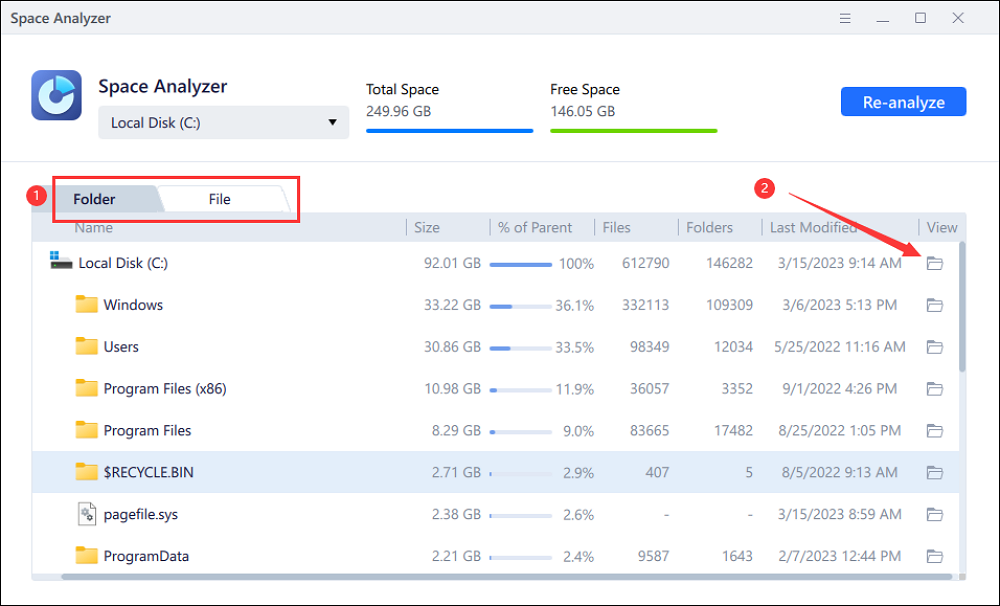
5. Choose to delete unwanted files: Go through the data carefully then apply the delete functionality of Space Analyzer to delete unwanted files and free space. Be very careful not to delete any system-sensitive files. If in doubt, always back up first.
Pro Tip:
Given Valorant size, if that is still not enough after deleting the files that you have analyzed, you might want to consider transferring big media files onto an external storage device or cloud storage.
Method 2: Extend the C Drive
If your C drive is full of crucial files or system data and there is not enough space available to accommodate Valorant, then probably the best possible solution would be extending it. That means managing the free space from another partition, say the D drive, and adding it to the C drive.
Option 1: Adjust Disk Layout
1. Launch EaseUS Partition Master: Launch EaseUS Partition Master and locate your C drive-containing disk.
2. Adjust the Layout: Right-click the disk, and from the pop-up menu click Adjust Disk Layout. At this stage, you now will see all the partitions that are on that disk such as, of course, the C drive, with any neighboring partitions.
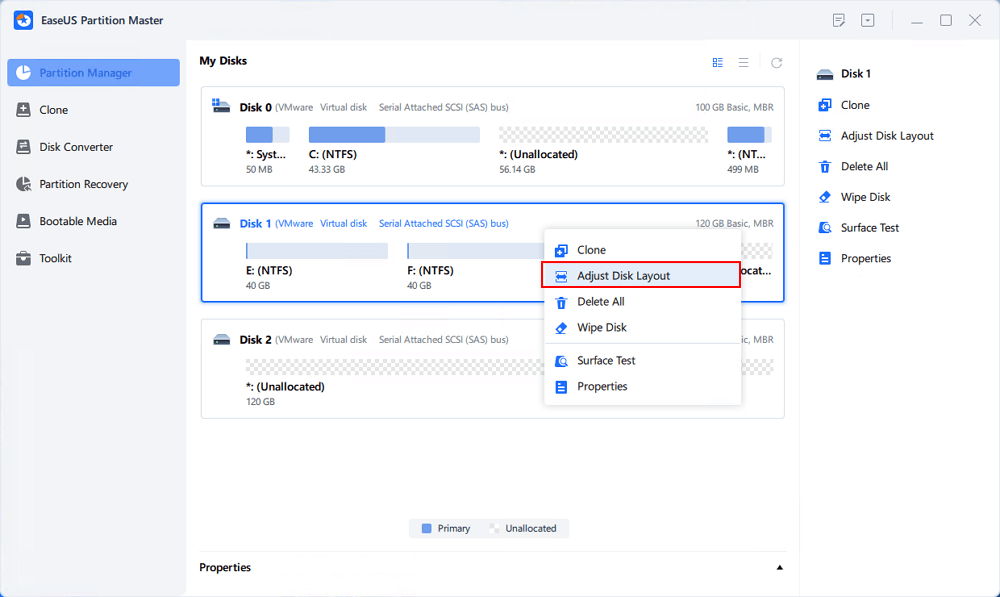
3. Resize the Partition: You would drag the edge of the C: drive partition to the right, extending it. If the C: drive is next to unallocated space, you can easily absorb that space into the C: drive by dragging the partition boundary.
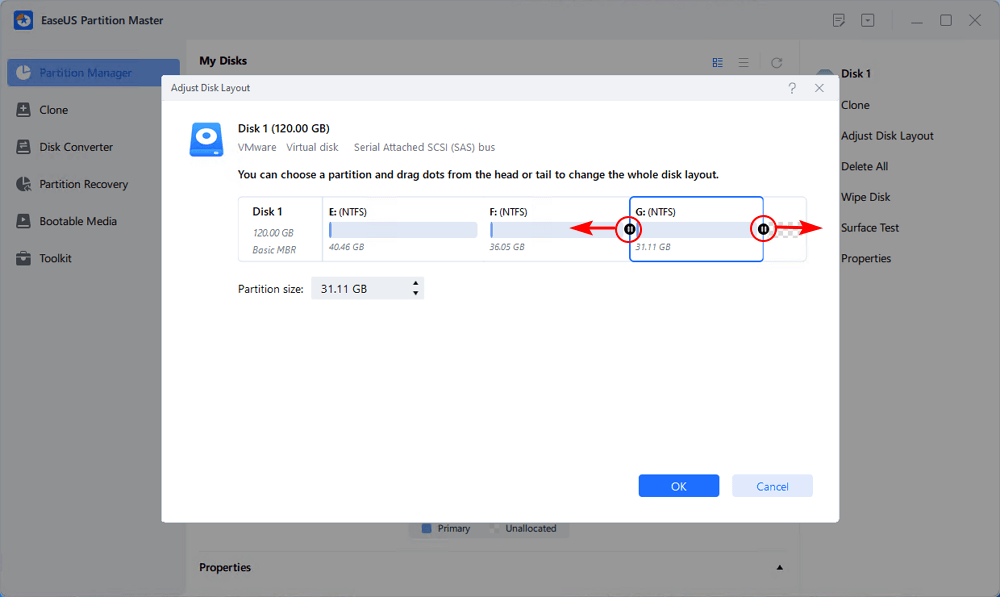
If no free space is available, you will need to shrink one of your adjacent partitions—in this case, D: drive—to make room for it. You will accomplish it by clicking the D drive and pulling the edge of the partition to the left to give room for the C drive.
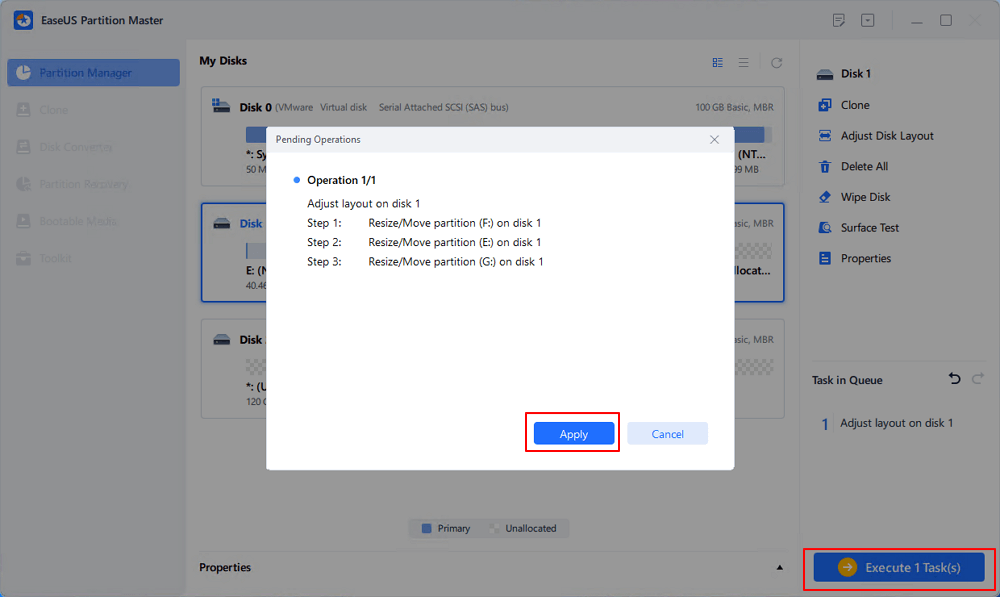
4. Apply Changes: Once you have committed to the partition sizes you would like, click OK. Lastly, click on the Execute Task button at the top and select Apply to confirm. It will only take some amount of time depending on how much data you have written, so take your time.
Option 2: Extend C Drive by Assigning Space
Changing the layout may be a bit trickier; thus, EaseUS Partition Master has an ‘assigned space’ feature that makes the process rather easy.
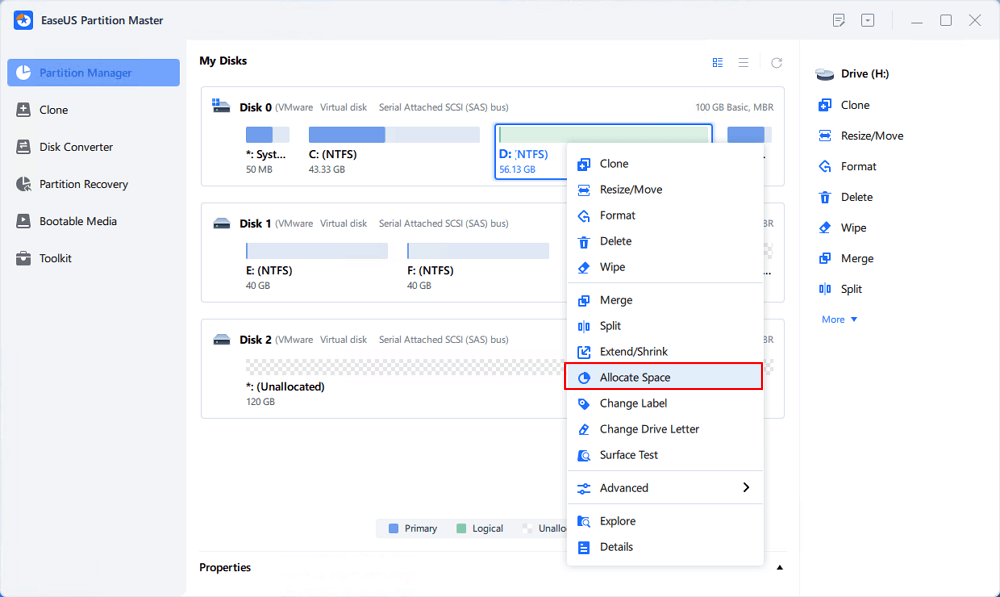
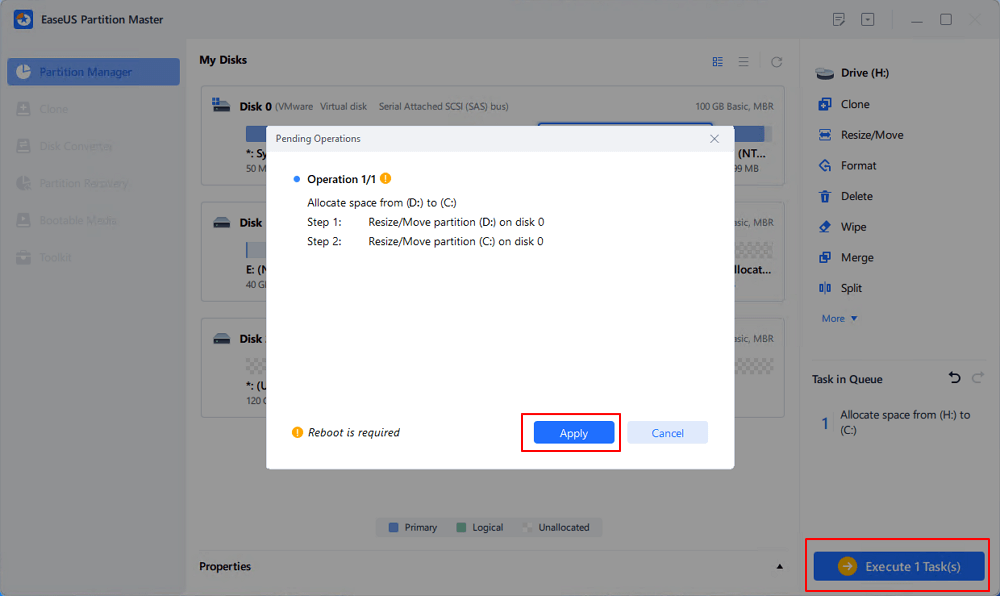
1. Right-click the D Drive: Right-click on it once you have enough free space in the D drive or any other partition. After clicking on it, a dropdown list opens; click on Allocate Space.
2. Add Free Space to C Drive: Pressing this brings up a pop-up window showing the slider of the amount of space to be added from the D drive to that of the C drive. The slider should be dragged to the right by highlighting the amount to be added to drive C.
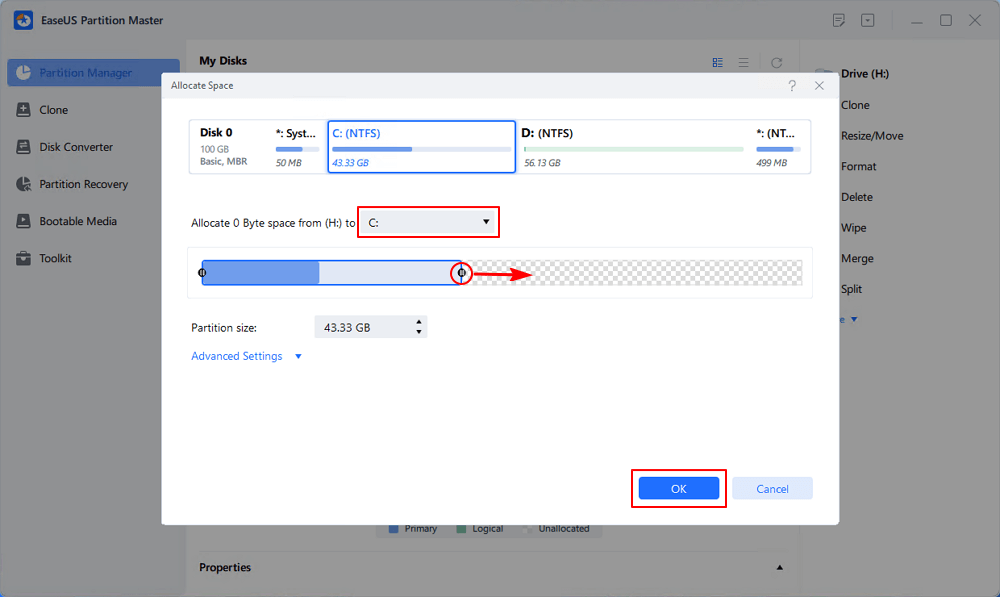
3. Changes are to be Applied: Once the amount of space is selected, click OK. Now click the Execute button as you have done previously. Click on Apply and execute the moving of space from D to C.
Pro Tip:
Backup of your data is highly recommended, in case data loss happens before an important change in partition layout.
Method 3: App Migration
If huge applications are taking up plenty of space on your C drive and you don’t want to delete them, then App Move is what you want. That is the option to relocate applications to another drive, say an external SSD, while keeping them fully functional.
Intended procedure:
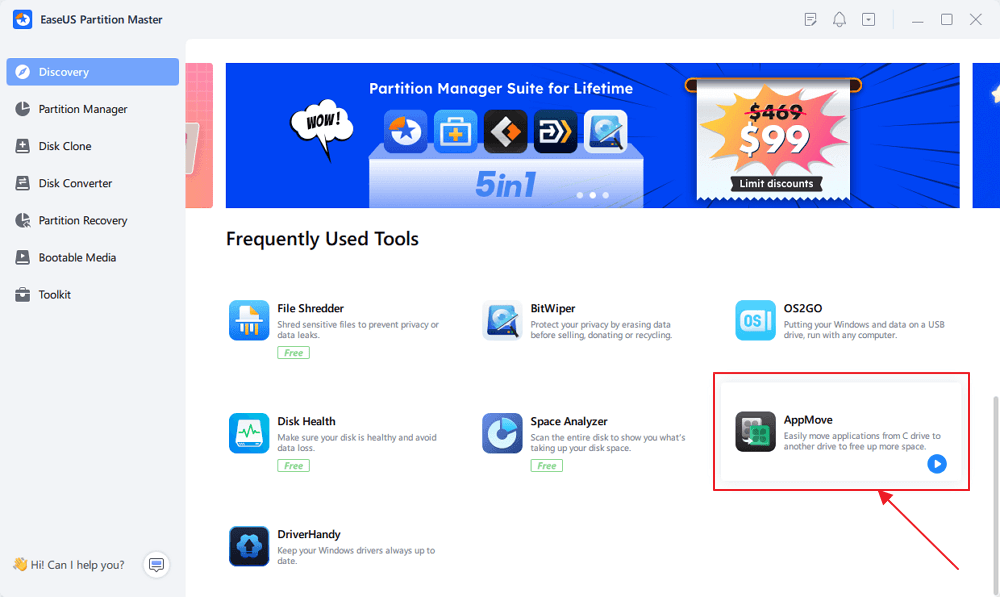
1. Launch and access EaseUS Partition Master: Fire up the application, and go to the Discover section.
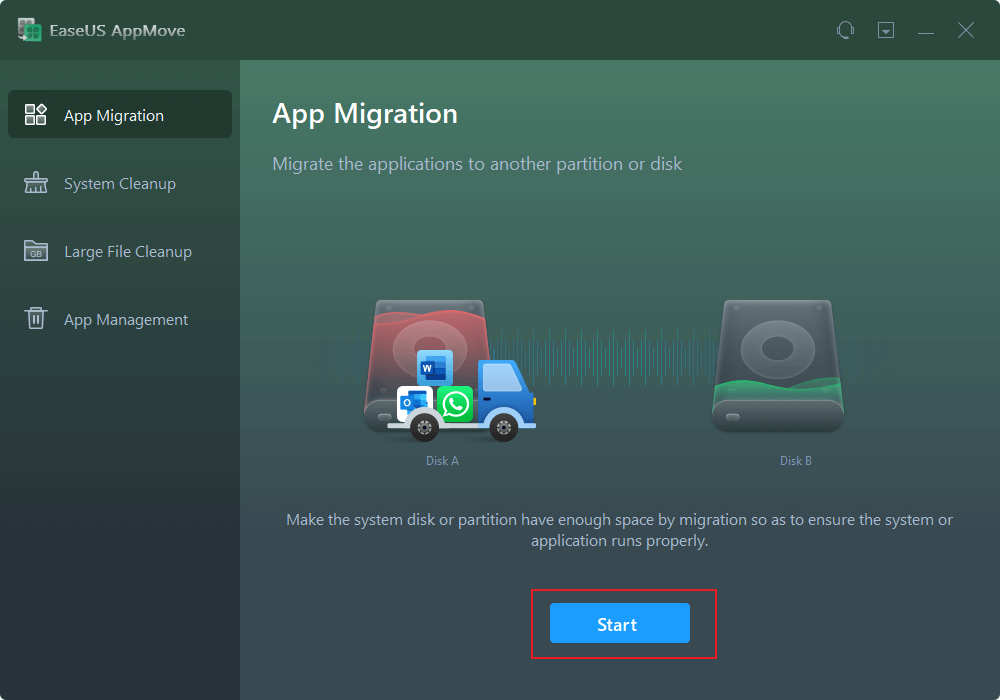
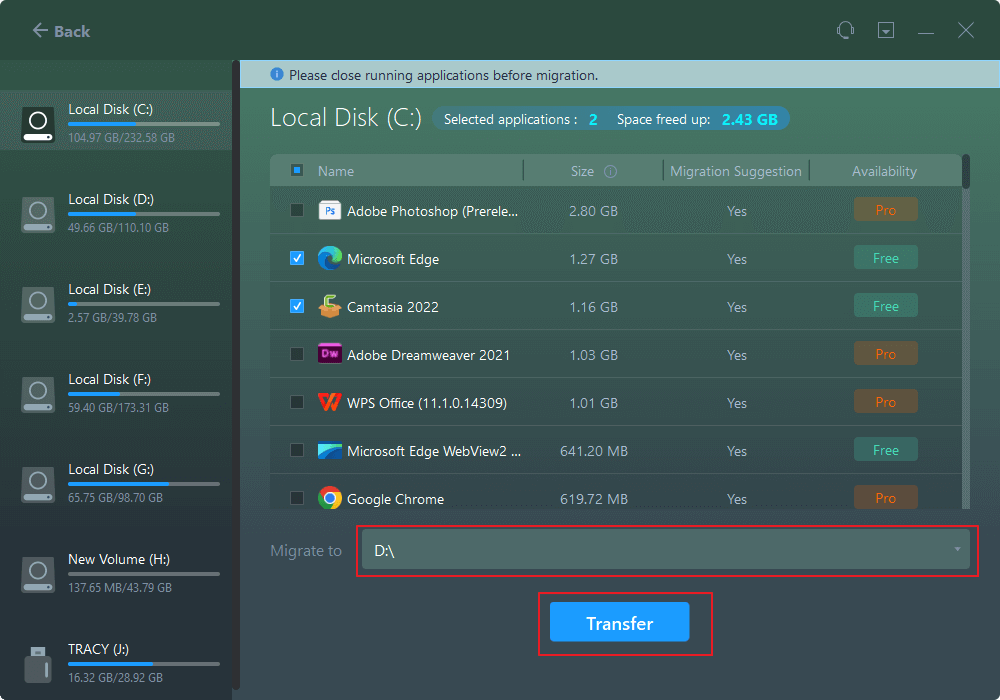
2. Select Apps to Migrate: Once the App Move feature has been enabled, click App Migration to launch the application transfer utility. You will then get the list of all the applications installed on your computer. It is an option through which you can select those apps or games that you want to move so that C drive can get some free space. You can relocate such heavy applications, such as video editors or games other than Valorant.
3. Destination Drive to be Chosen: Next to the option Migrate to, you select where the target drive will go—in other words, where you want your chosen programs to move into. Make sure the target drive is sufficiently big to accommodate the programs you wish to migrate onto it.
4. Migrate Programs: Once applications are selected and a target drive selected, the Transfer button will initiate the migration process. It performs all of the magic from this point forward in that it reconfigures the app’s location in your system so it will continue to function properly, even after it has been relocated to another drive.
Pro Tip:
Now and then, there are some very large applications you hardly use that you should relocate onto your external hard drive. This provides room, but you don’t necessarily lose use of the applications.
Takeaway
Considering the extreme Valorant size, it’s with these steps that you can go ahead and free up enough space for the Valorant installation and that of other applications, too, without having to compromise performance or storage. Whether it is taking a closer look at your disk space, extending the C drive, or even migrating your applications, these solutions keep your gaming setup running optimally. Happy Gaming!
FAQ
1. What is Valorant size?
Some Valorant-specific computer requirements include approximately 28.4 GB for disk space installation. However, only approximately 66.1 MB of installer space would be downloaded by any player via the official website for Valorant.
2. How do I check my disk space availability before installing Valorant?
You might be interested in how much space your C: drive has used. Open File Explorer, right-click your C:, and check in its “Properties.” Alternatively, you could use tools that allow managing a hard drive.
3. How do I free up space for Valorant?
Since the Valorant size is huge, you can follow methods like using a disk space analyzer, extending your C: drive, and migrating huge applications or games to an external hard drive or secondary partition to free up space.
4. Can I play Valorant on low system requirements?
Valorant has really low system requirements, but decent disk space and an able system device will make this game run well. It is recommended to have 4 GB of RAM or more with a compatible graphics card for smooth performance.

